当我们所搭建的服务并不具备公网IP,无法从外放访问服务时,可以利用frp来进行内网穿透。
什么是frp
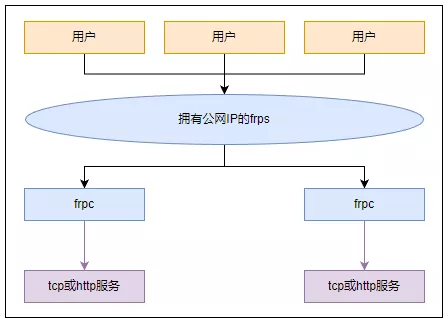
frp服务是内网穿透服务中的一种,可以理解为花生壳内网穿透的替代品,但是要比花生壳内网穿透快很多。它的大致原理如下,用户访问安装有frps服务的设备,frps能根据与frpc建立的联系,自动打通隧道,使用户的访问映射到内网的客户端。
开始使用frp
接下来我们分两种情况介绍具体如何使用:
- 当我们有一台暴漏公网IP的Centos服务器时。
- 当我们没有任何可以暴漏公网IP的服务器时。
在Centos上搭建frp服务
当我们有一台暴漏公网IP的Centos服务器时,可以在服务器端安装frps服务。
下载frp并解压
到GitHub查看最新版本:https://github.com/fatedier/frp/releases
如果访问不了github,我在这儿也给出0.45.0版下载地址。
操作命令如下:
1
2
3
4
5
6
|
wget https://github.com/fatedier/frp/releases/download/v0.45.0/frp_0.45.0_linux_amd64.tar.gz
wget https://oss.dreamlyn.cn/nas/blog/frp_0.45.0_linux_amd64.tar.gz
tar zxf frp_0.45.0_linux_amd64.tar.gz
|
配置frps
1
2
3
4
|
cd frp_0.45.0_linux_amd64/
vim frps.ini
|
配置文件如下:
1
2
3
4
5
6
7
8
9
10
11
12
13
14
15
16
17
18
19
20
21
| [common]
bind_port = 7000
vhost_http_port = 80
vhost_https_port = 443
[ssh]
listen_port = 2200
auth_token = 123456
[http]
type = http
custom_domains = nas.example.com
auth_token = 123456
[remote]
listen_port = 3389
auth_token = 123456
|
启动
设置开机自启
使用vim创建并编辑 /lib/systemd/system/frps.service,设置如下
1
2
3
4
5
6
7
8
9
10
11
12
13
14
15
16
17
| [Unit]
Description=Frp Server Service
After=network.target
[Service]
Type=simple
ExecStart=/usr/local/frp_0.45.0_linux_amd64/frps -c /usr/local/frp_0.45.0_linux_amd64/frps.ini
KillSignal=SIGQUIT
TimeoutStopSec=5
KillMode=process
PrivateTmp=true
StandardOutput=syslog
StandardError=inherit
[Install]
WantedBy=multi-user.target
|
之后就可以使用如下命令控制frp服务
1
2
3
4
5
| 启动服务 systemctl start frps
开机自启动 systemctl enable frps
重启服务 systemctl restart frps
停止服务 systemctl stop frps
查看日志与状态 systemctl status frps
|
使用第三方的免费frp服务
当我们没有任何可以暴漏公网IP的服务器时,就需要使用第三方的免费frp服务,如果已经使用centos搭建了frp服务,可以跳过这段直接看客户端的搭建。
先来说下什么是第三方免费frp服务吧,它的存在使我们可以在没有公网IP服务器、并且运营商早已封杀80和443端口的情况下,爆露出我们的服务,笔者这个博客的搭建也是采用的这种形式。
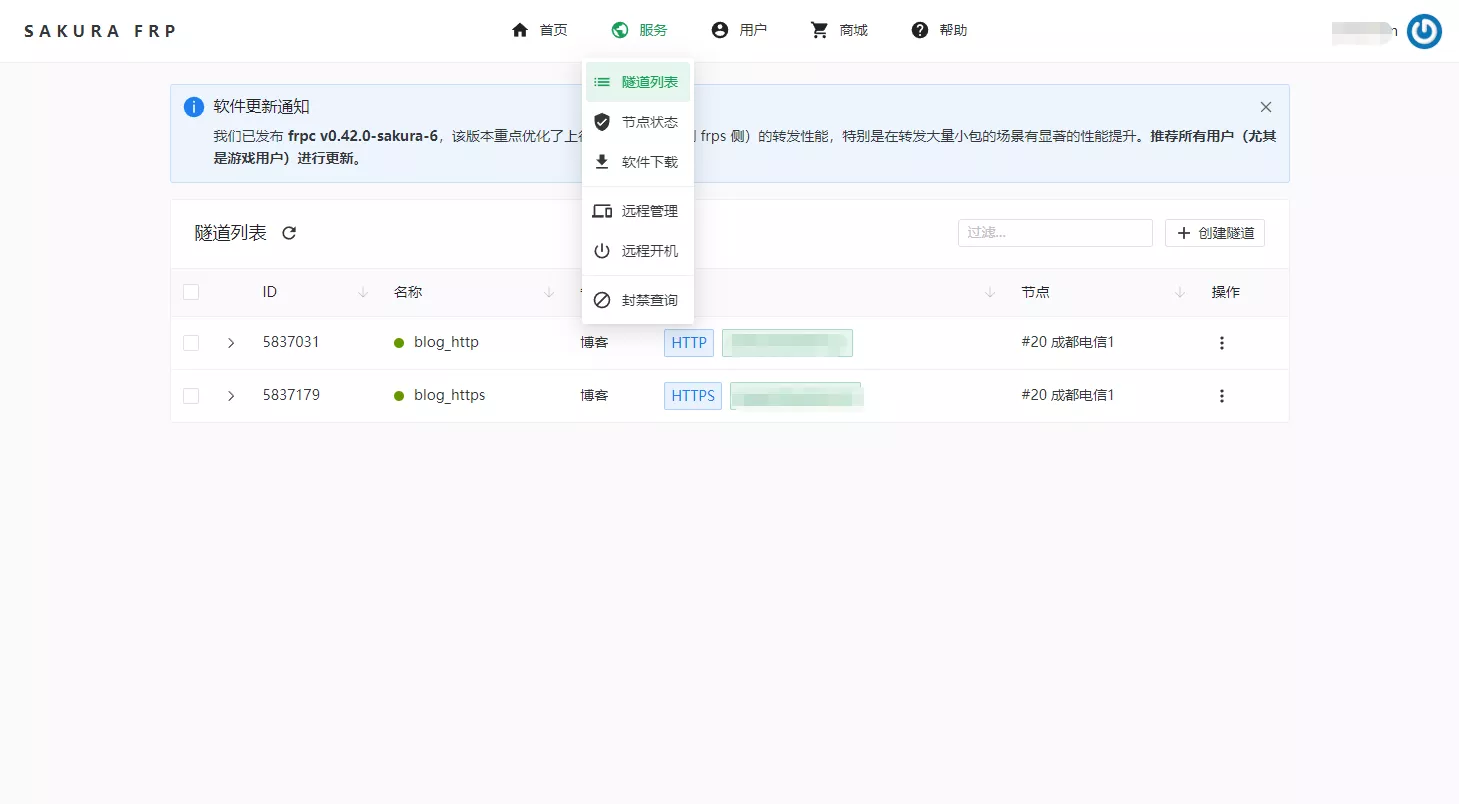
在此推荐使用SAKURA FRP,隧道限速10M足够使用,每月有5G的免费流量,关键是签到还送流量。
第一步先注册,然后到管理界面点击 服务->隧道列表。
然后点击创建隧道然后选择节点,这里的隧道可以理解为从公网IP到自己本地服务的一条线路。
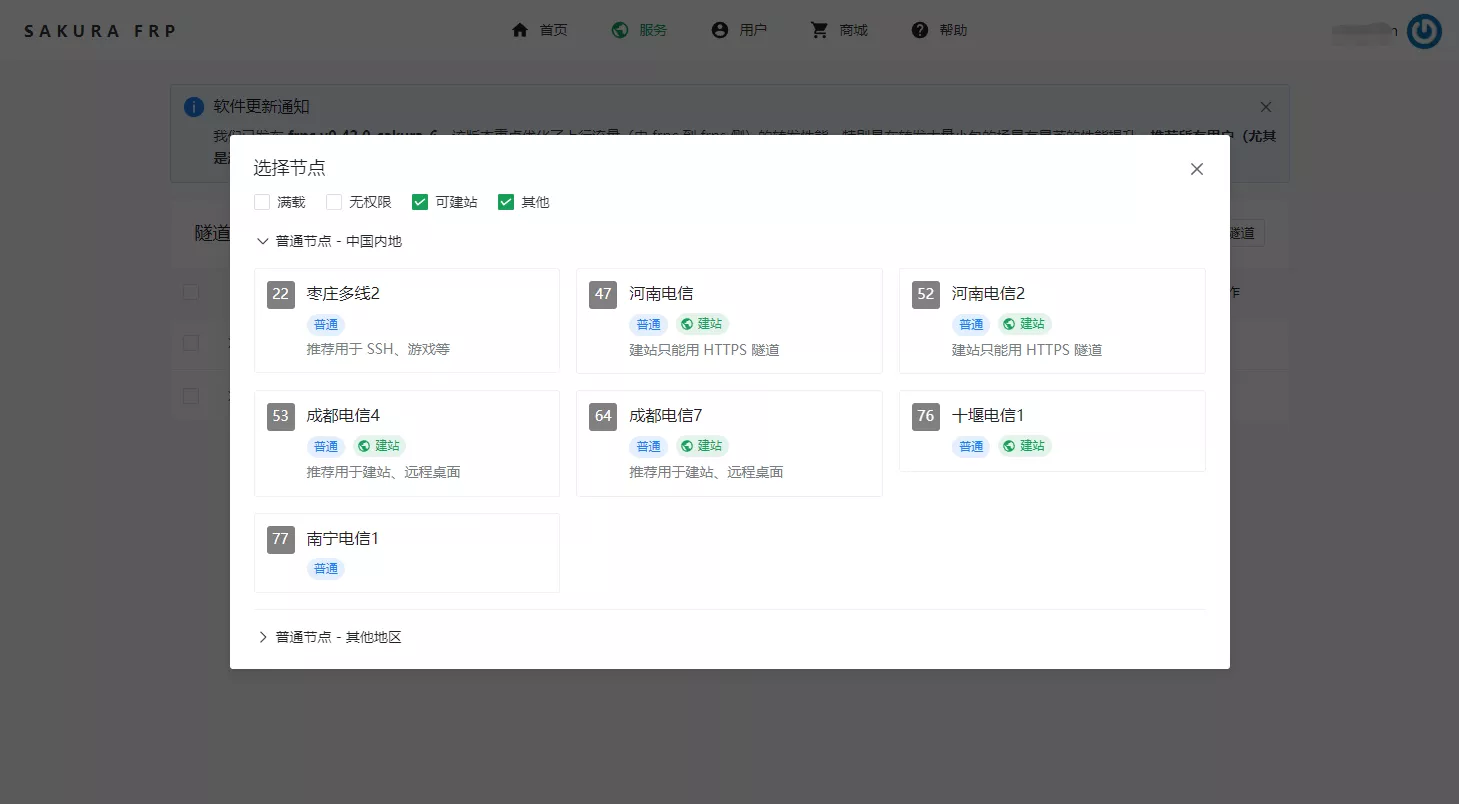
隧道类型,一般建站的话直接选HTTP/HTTPS,其他的选TCP隧道。
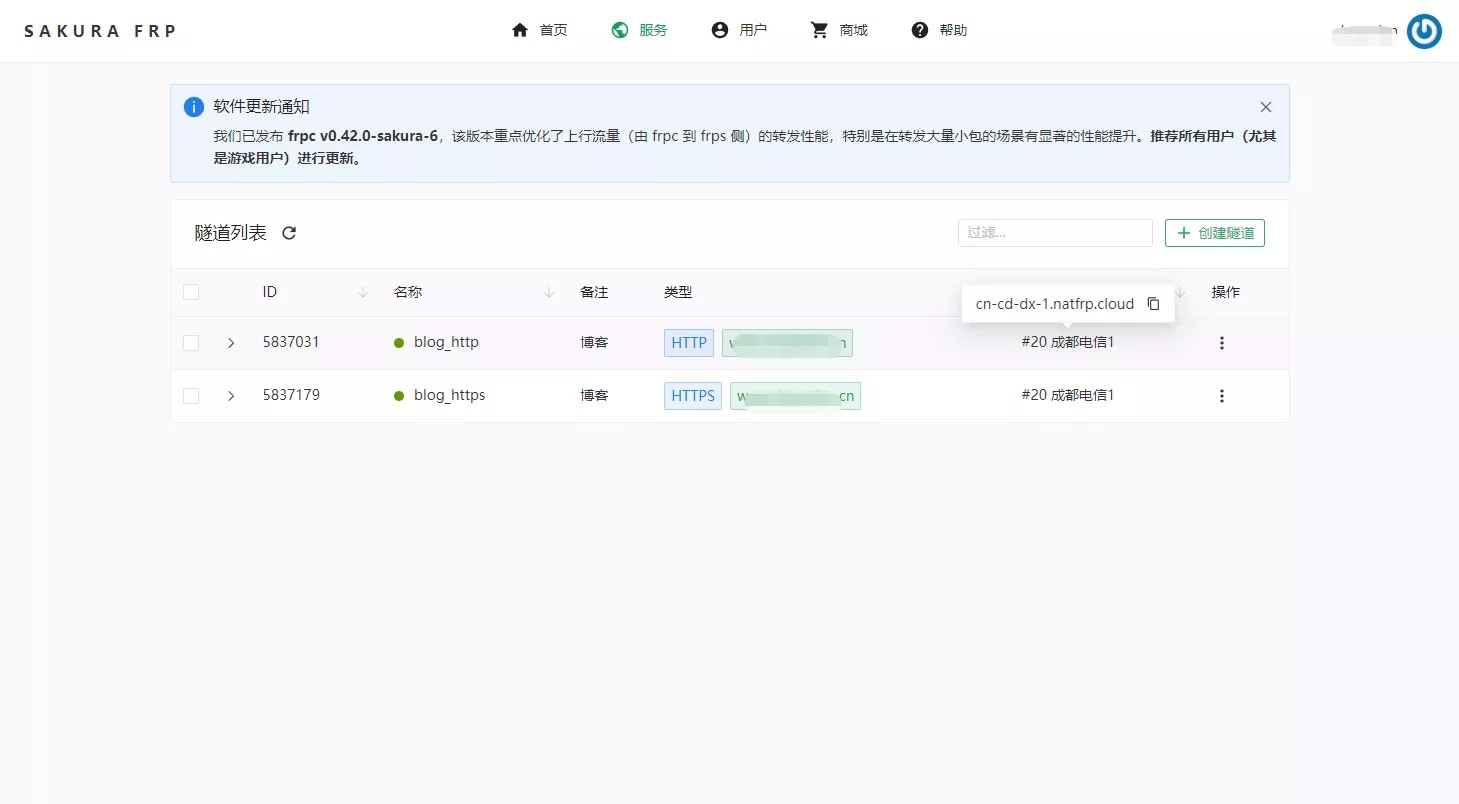
如果是建站使用的话,还需要设置域名cname记录,如下图所示cn-cd-dx-1.natfrp.cloud是我需要设置的cname值(cname值需要到域名管理后台设置)。
注:如果选择国内节点,建站需要先进行备案。
记录配置文件,供后面客户端配置使用
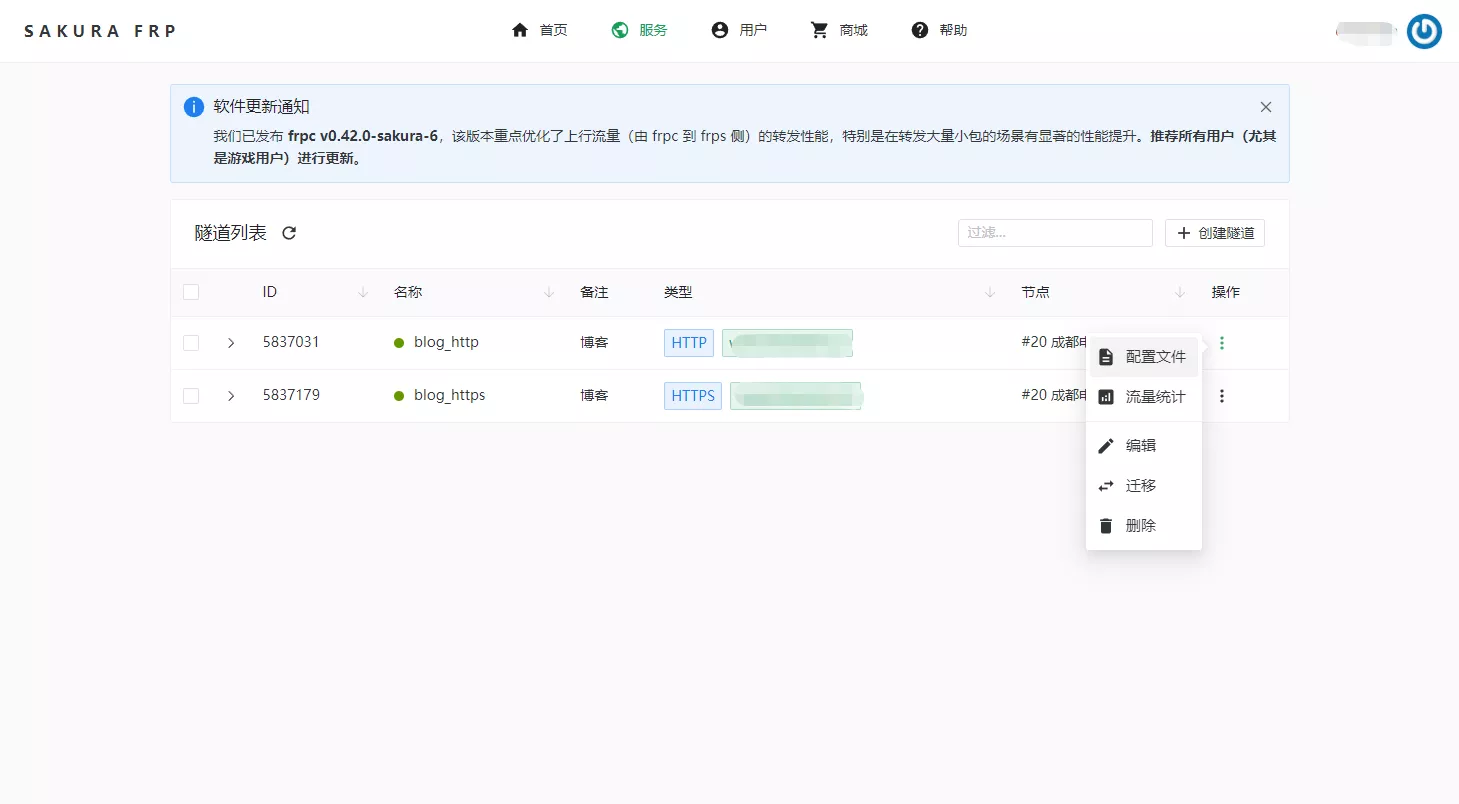

配置文件有两种形式,其中第一种是采用SAKURA FRP官网提供的客户端来连接。第二种采用标准frp客户端进行访问,笔者一直采用第二种形式。
使用NAS创建frp客户端
终于轮到NAS登场了,我采用docker-compose的方式安装frp。
在nas上合适的位置创建目录,并创建如下文件。

docker-compose.yml文件如下
1
2
3
4
5
6
7
8
9
10
11
12
13
14
15
16
17
| ---
version: "3"
services:
natfrp:
image: oldiy/frpc
container_name: natfrp
environment:
- PUID=1000
- PGID=1000
- TZ=Asia/Shanghai
volumes:
- ./configs:/frp
restart: unless-stopped
networks:
default:
external:
name: docker_default
|
frpc.ini文件如下
1
2
3
4
5
6
7
8
9
10
11
12
13
14
15
16
17
18
|
[common]
server_addr = 服务器IP地址
server_port = 7000
auth_token = 123456
[ssh]
local_ip = 192.168.31.206
local_port = 22
remote_port = 2200
[http]
type = http
local_ip = 192.168.31.206
local_port = 5000
custom_domains = nas.example.com
[remote]
local_ip = 192.168.31.10
local_port = 3389
remote_port = 3389
|
1
2
3
4
5
6
7
8
9
10
11
12
13
14
15
16
17
18
19
20
21
22
23
24
25
26
27
28
|
[common]
user = xxxxxxxxxxxx
sakura_mode = true
use_recover = true
login_fail_exit = false
protocol = tcp
tcp_mux = true
pool_count = 1
token = xxxxxxxxxxxx
server_addr = cn-cd-dx-1.natfrp.cloud
server_port = 7000
[blog_http]
type = http
local_ip = 192.168.31.206
local_port = 80
custom_domains = www.example.com
[blog_https]
type = https
local_ip = 192.168.31.206
local_port = 443
custom_domains = www.example.com
|
启动docker
1
2
3
| cd natfrp
docker-compose up -d
docker-compose logs -f
|
OK,可以了,使用www.example.com访问你的网站吧!!!
文章有不清楚的可以在评论区留言,我会尽快回复.

 微信
微信